Intro to Element Filter
![]() Updated 1 year ago
by
Adam Heon
Updated 1 year ago
by
Adam Heon
Element Filter: Quick Look
The eVolve Element Filter feature provides for the utilization of highly customizable and storable rule sets, which can allow a user to quickly select, isolate, hide, halftone, or apply transparency to specific model items. This not only allows for quick view changes, but can also fully tailor all evolve and Revit commands to each user's needs.

The Element Filter Palette
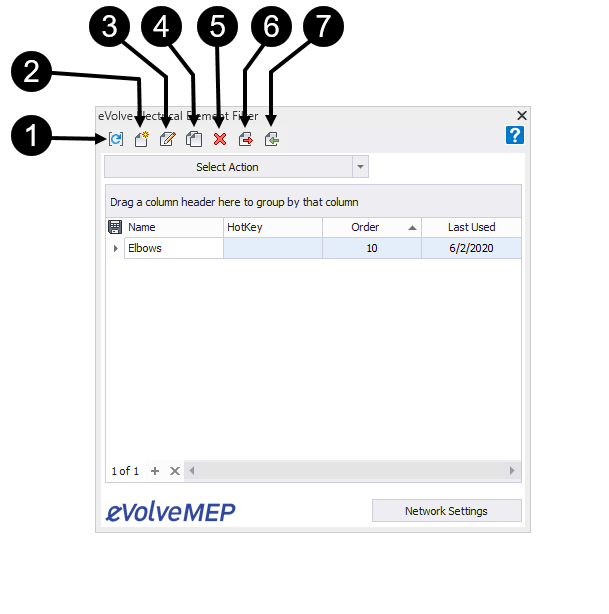
- Reset View: Used after applying the Isolate, Hide, Make Half Tone, or Make Transparent actions on the filter. The Restore View button will restore the view to its pre-filtered state.
- New Filter: Directs to the Filter Designer

- Enter a filter name
- Select which category or categories to apply this filter to.
- Under the Rules tab, define the AND/OR statements for the parameters based on the categories chosen.
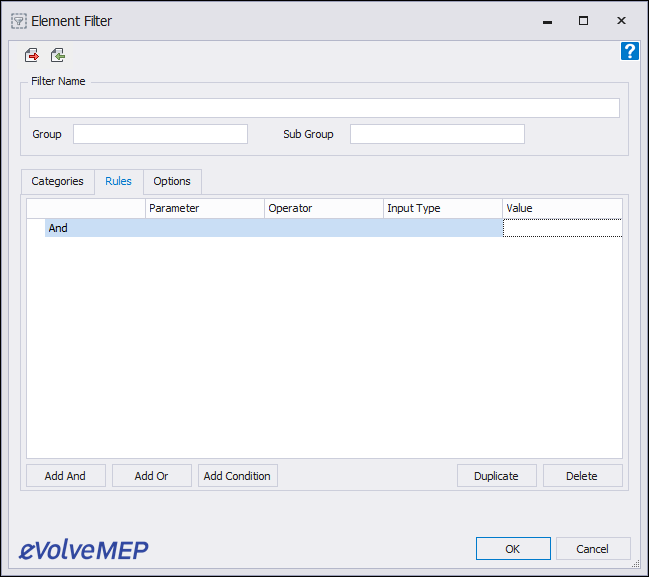 After defining the AND/OR statement, click on Add Condition to get started with the ruleIMPORTANT - Parameter names are case sensitive!If a needed parameter is not available, the creation of a shared parameter may be the best solution. Use the eVolve Electrical Parameter Sync tool.One of the "Input Type" options is to prompt for value. When set, a dialog will ask for the "Value" when the user clicks on the rule, making the rule more widely usable.
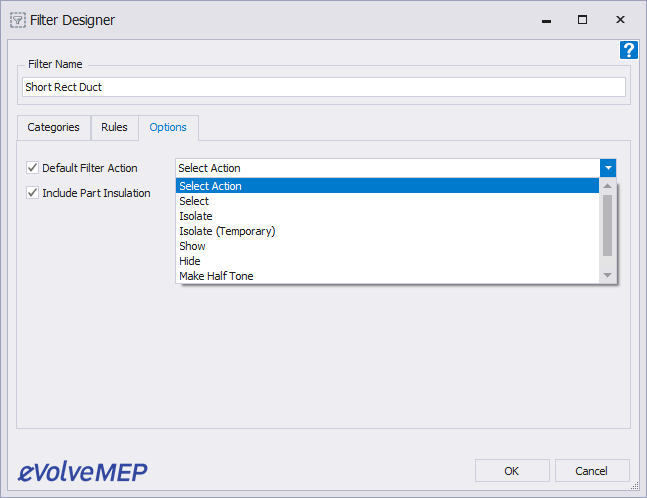
- The Options tab allows users to define the default action of a rule. If this is set to anything other than "Select Action," the action defined will be automatically applied when the rule is double-clicked within the palette.
- Modify Filter
- Duplicate Filter
- Delete Filter
- Export Filter(s): Select the filter or filters to export.
If multiple filters are selected, they will all be included in the same export file
- Import Filter(s)
- Help: Links to this article
- Network Settings: By default, these rules are stored locally for each user. Setting the network path ensures that everyone is looking at the same ruleset.
Using the Element Filters
There are 3 ways to use the filters once they have been created:
- Select the filter, then click on the select action button to apply the default action. If a default has not been applied then this button will supply a drop-down of all available options.
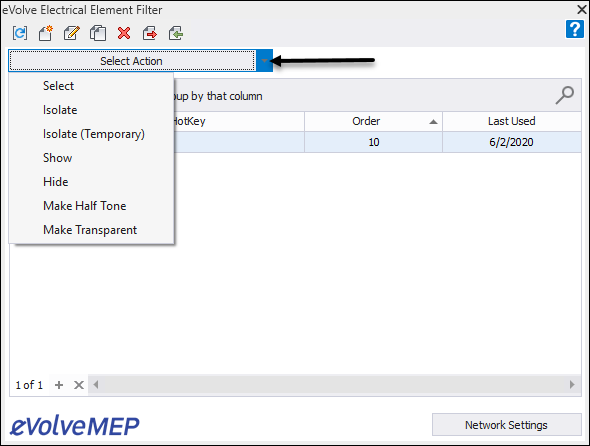
- If a default action has been applied, double click on the rule to activate it.
- Defining hotkeys.
- In the "HotKey" column enter the hotkey value to use.
- If not done already enable the Element Filter hotkey in Revit options. In the example below, we have set ours to "EV."

- Enter the Element Filter hotkey, then the filter rules hotkey to activate the rule. For example, to apply the created rule "SD" in a project, type hotkey "EV" to activate the hotkey listener, then type the rule hotkey "SD" to activate the rule.
Be sure to either hit TAB or click on another part of the Element Filter palette after entering a hotkey to avoid an extra space after the hotkey.