MC Cable
![]() Updated 2 years ago
by
Adam Heon
Updated 2 years ago
by
Adam Heon
One limited option for drawing with mc cable is not enough, so eVolve Electrical created its own enhanced MC Cable feature with multiple families and types. It also allows for fast and simple creation of new mc cable types with custom descriptions.
The System Families/MC Cable tab
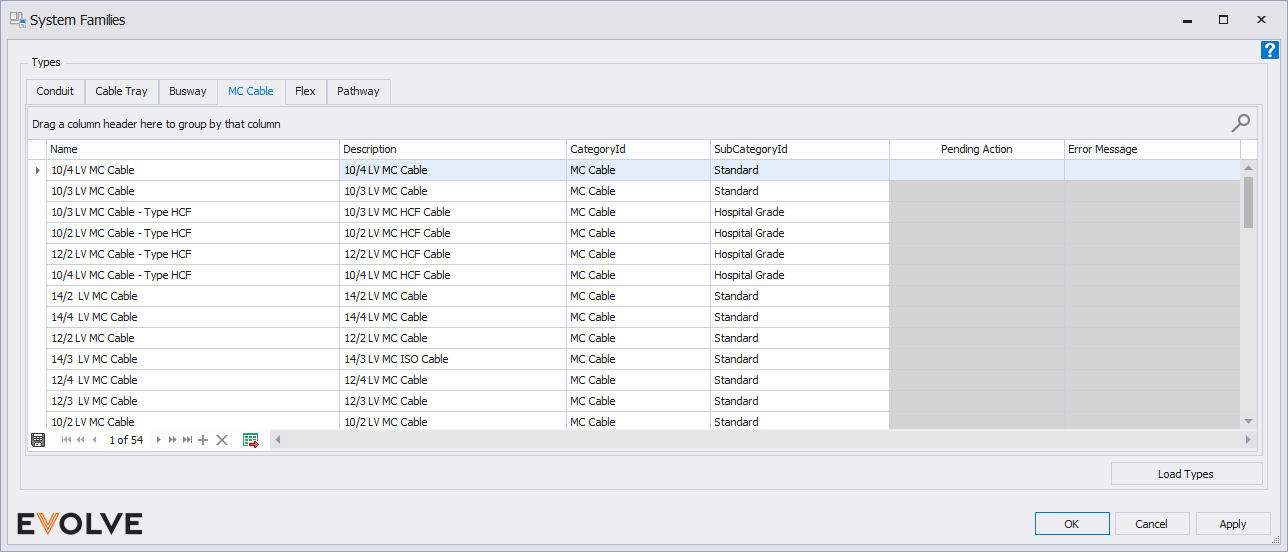
Name - The type name of the cable.
CategoryId - The category of the conduit. It can be changed in this window.
SubCategoryId - The subcategory of the conduit. It can be changed in this window.
Description - The eE_Description for the conduit which is what will appear in schedules and boms.
Load Types - Loads all eVolve MC Cable types into the project for faster loading throughout the life of the project. Once loaded, the types can be accessed in standard Revit family locations.
To Draw with MC Cable
- From the eVolve Electrical ribbon, in the Utilities panel, click System Families.
- From the System Families window, on the MC Cable tab, click Load Types.
- Once the types are loaded, double-click the desired row to start drawing.
- Select a type and click OK.
To Create New MC Cable Types
1. From the Project Browser, under the Families category, expand either the Conduit Without Fittings family or expand the Flex Pipes family.
2. Right-click on any one of the eE_MC Cable Types to expand a list of options.
3. Click Duplicate to make a copy of this type in the family folder.
4. Right-click the recently created type.
5. Click Rename and enter the desired description. Type name must contain prefix eE_MC_
6. Hit Enter key or click outside of the text field.
7. Right-click on the newly created type, select Type Properties.
8. Under the Identity Data group in the Description parameter field, enter the desired description of the cable type. The description will appear within the eVolve_Description parameter.