Save Grid States
Saving eVolve Grid States
Save eVolve grid states can further customize and control workflows with custom groupings, sorting, and filtering of grids. This feature is available in all of the eVolve windows with grids and allows users to save the current format of the grid for later use. Grid States can be made, saved, and accessed by clicking on the Save Grid States icon wherever it is available. For help with customizing grids, please see Using eVolve's Dialog Grids.
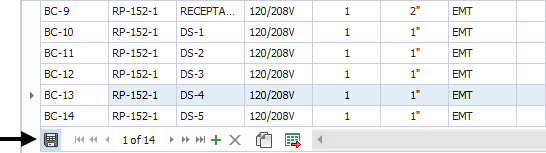
The Grid State feature is available in all eVolve grids. It is denoted as a save icon on the left side of the record navigator.


Saving a grid state
- After the required modifications have been made to the desired grid, click the Grid State icon.
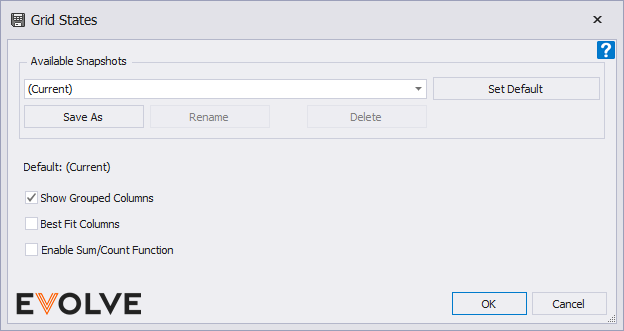
- From the Grid States window, click Save As.
- From the New Grid State window, enter a unique name and click OK. The newly create name appears in the Available Snapshots menu.
- From the Grid States window, click OK to close.

Loading an existing grid state
- From the desired grid, click the Grid State icon.
- From the Grid States window, click the Available Snapshots menu, select the desired grid state, and click OK.


Setting a default grid state
- From the Grid States window, click the Available Snapshots menu, select the desired grid state, and click Set Default. The selected grid state's name appears as Default located in the lower left of the window.
- From the Grid States window, click OK to close.

Restoring the shipping default grid state
- From the Grid States window, click the Available Snapshots menu and click Restore.
- From the Grid States window, click OK to close.
NOTE: The (Restore) state cannot be removed; this is the default state we deliver with the software and is utilized to remove custom sorting if needed.
TIP: To quickly restore a grid to the default state, right-click in the upper left corner of the grid.

Renaming a grid state
- From the Grid States window, click the Available Snapshots menu, select the desired grid state, and click Rename.
- From the Rename Grid State window, enter a new name and click OK.
- From the Grid States window, click OK to close.

Deleting a grid state
- From the Grid States window, click the Available Snapshots menu, select the desired grid state, and click Delete.
- From the Grid States window, click OK to close.

Show Grouped Columns
Use the Show Grouped Columns option to toggle seeing grouped columns within the grid. This option takes precedence over the global option from Workstation Settings.

Best Fit Columns
Enabling the Best Fit Columns option will automatically size visible columns such that they all fit within the grid. When disabling, columns can be expanded without affecting other columns; if necessary, a horizontal scrollbar appears allowing users to view the expanded columns. This option takes precedence over the global option from Workstation Settings.

Enable Sum/Count Function
When enabled, a column summary can be added to the grid's footer or if grouped, the group's footer. Please see the Grid Sum/Count Functions article for more information.
