Overview of the eVolve Element Filter
Overview of the eVolve Element Filter

Summary
The Element Filter is a dockable panel with highly customizable rulesets that help users quickly select, isolate, show/hide, halftone, or apply transparency to specific items in a model. This ability allows for quick view changes and tailors EVOLVE/Revit commands to suit the user's needs.
- eVolve tab ⮞ Utilities panel ⮞ Element Filter button


Prerequisites

Usage
Depending on how the ruleset is configured, the usage may differ. However, a ruleset can run against a view or preselected elements. If the ruleset is run against a view, the filter action is applied to all elements in the view that adhere to the ruleset's element filter. If the ruleset is run against preselected elements, the filter action is applied to only preselected elements that adhere to the ruleset's element filter.

Window Overview
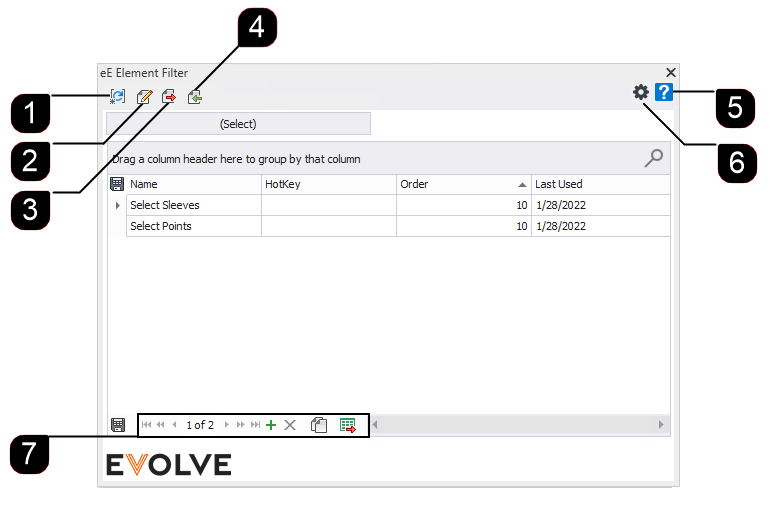
Form buttons
- Reset View: Clears all filters in the current view.
Hold Shift to execute active Colorizer rules against the current view after clearing.
Note: Depending on the current rules and number of elements within the active view, this process could take some time to run - Modify Filter: Modifies the selected filter.
- Export Filter: Exports the selected filter(s) to a file.
- Import Filter(s): Import filter(s) from a file.
- Help: Opens the Helpdocs site.
- Settings: See the Element Filter Settings section below.
- Record Navigator
Record Navigator buttons
- Add - used to add a new row to the grid.
- Delete - used to delete selected row(s).
- Duplicate - used to duplicate selected rows.
- Export Grid - exports the grid as currently displayed to Excel.

Tips and Tricks
Element Filter Settings
Network Location
- Browse or type the path of your company's network location where the Element Filters are stored.
- By default, rules are stored locally for each user. Setting the network path ensures that everyone is looking at the same ruleset.
Options
- Hotkey for Reset View: Used to define the hotkey to clear all filters in the current view.

Creating an element filter for section views
This is possible as of the 7.4 release or higher. After completing the following steps, you will be able to utilize the Select, Isolate, Hide, Show, Make Halftone, or Make Transparent functions on a section view.
- If the Element Filter dock pane is not already enabled, from the EVOLVE ribbon, in the Utilities panel, click Element Filter.
- From the Element Filter dock pane, in the data navigator, located at the bottom of the grid, click the Add new button
 .
. - From the Element Filter window,
- In the Filter Name panel, specify a filter name and optional Group and Sub Group.
- In the Categories panel, click the Views checkbox.
- In the Rules panel, click Add Condition. A new row is added to the Rules grid.
- From the newly created row,
- In the Parameter cell, click the menu and select or type Family.
- In the Operator cell, ensure is equal to is selected.
- In the Input Type cell, ensure Constant Value is selected.
- In the Value cell, type Section. Then click OK to save the filter.

Element Filter Hot Keys
To increase efficiency and productivity, the Element Filter feature includes the ability to assign hotkeys to user-created filters. From the Element Filter palette, enter the desired hotKeys in the HotKey column next to each filter Name. While in a project, type EF to bring up the HotKeys Listener.
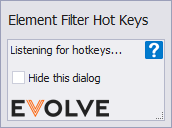
NOTE: the HotKey Listener dialog may be hidden by clicking the Hide this dialog checkbox.
Once activated, the HotKey Listener is displayed for about 3 seconds to allow the desired Element Filter HotKey to be entered and apply its associated filter.
TIP: If not done already, enable the ElementFilter:Element Filter Hot Keys keyboard shortcut in Revit (View/User Interface/Keyboard Shortcuts). Consider assigning it to EF to easily remember the Element Filter hotkey for activating the HotKey Listener.
