Hanger Placement


Summary
Hanger Placement allows you to automatically place single and trapeze-style hangers along a run of elements. Hangers may be placed along the path of elements to a change of direction, like a bend, tee, etc.
- eVolve tab ⮞ Supports panel ⮞ Hanger Placement button


Prerequisites

Usage
- From the eVolve ribbon, in the Supports panel, click Hanger Placement.
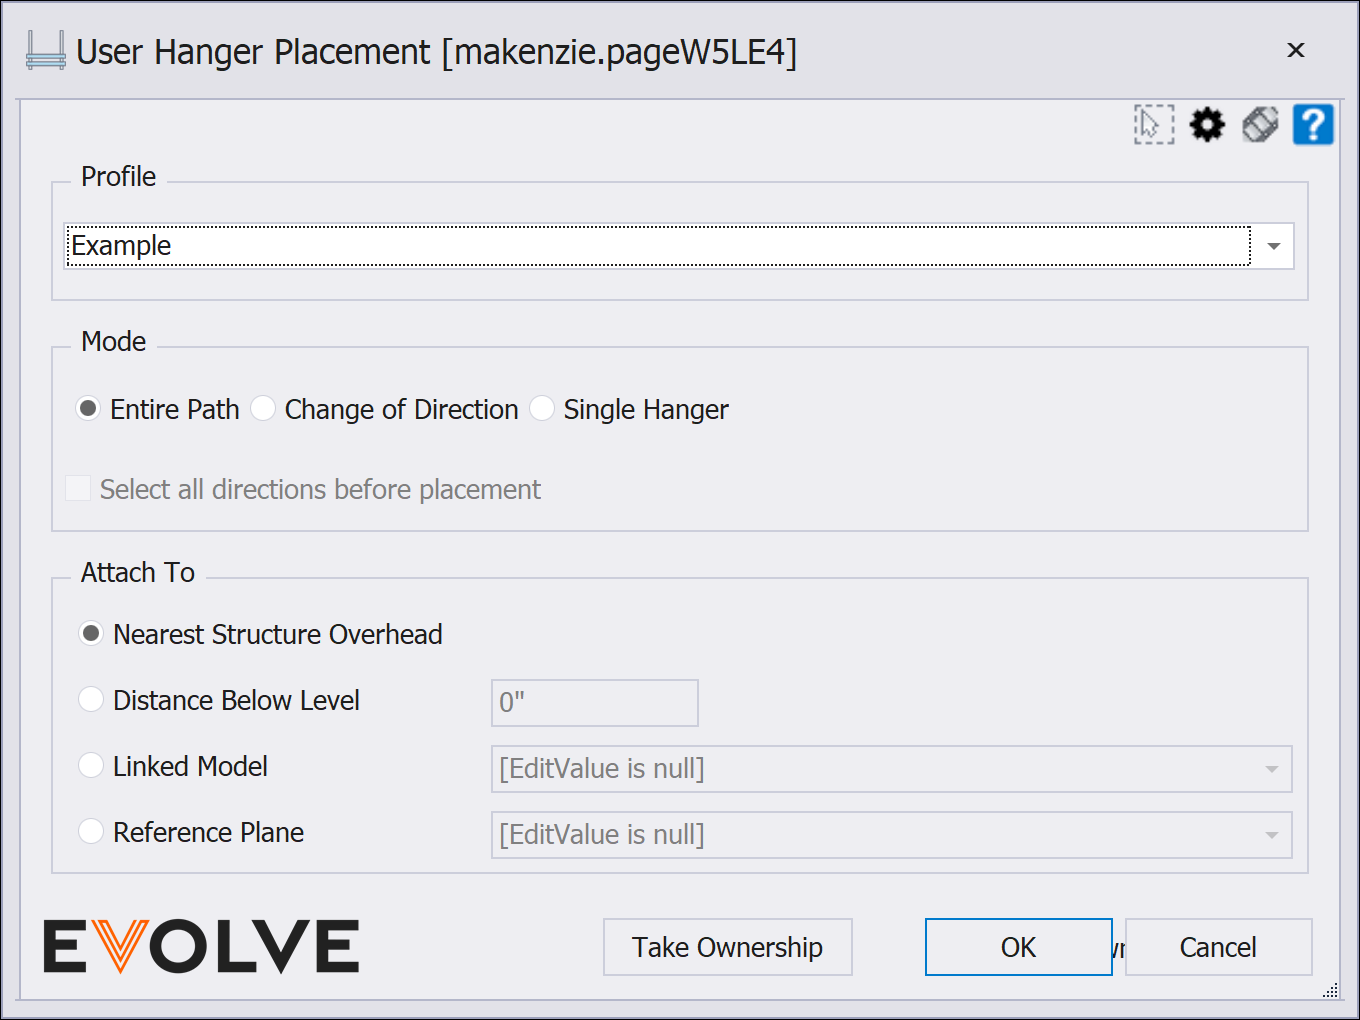
- From the Hanger Placement window, select the required Profile and Mode, and set the desired Attach To option, then click OK.
NOTE: If a placement profile has not yet been defined, go to Hanger Settings and build one. - From the drawing area, select the desired parallel straights to place hangers and click 'Finish'.

Window Overview
Hanger Placement window
NOTE: The Hanger Placement's predefined selection filter can be modified via the Selection Configuration. Please see the link in the Relevant Articles below.
- Profile panel menu
- Displays a list of available placement profiles
- Mode Panel
- Entire Path - when selected, hangers are placed along the entire connected run.
- Change of Direction - when selected, hangers are placed until a change of direction is reached, like an elbow, tee, cross, etc.
- Single Hanger - allows users to point and click to place a hanger.
NOTE: after placing a hanger, the command remains active until canceled by the user so that multiple hangers may be placed.
- Select all directions before placement - When selected, rather than picking elements and a direction before placement occurs, element and direction selection will be repeated until finished, and then all placements will occur at once.
NOTE: This option is only enabled when the 'Change of Direction' radio button is selected for the placement Mode.
- Attach To panel
- Nearest Structure Overhead radio button - evaluates the host model and all "loaded" linked models and attaches to the nearest structure element.
- Distance Below Level radio button dialog box- evaluates the host model and attaches to the nearest level overhead. The input value reduces the rod length below the level to compensate for the floor thickness.
- Linked Model radio button menu - evaluates the specified linked model and attaches to the nearest structure element. The menu displays a list of all "loaded" linked models.
- Reference Plane radio button menu - evaluates the host model and attaches to the specified Reference Plane.
NOTE: Distance Below Level and Linked Model are only available when using a Family (RFA) based hanger profile.

Tips and Tricks
- For crowded areas such as electrical rooms use Change of Direction combined with Select all directions before placement to quickly place hangers on multiple sets of parallel conduits.
