Compare Data Utility
![]() Updated 2 years ago
by
Kerry Poe
Updated 2 years ago
by
Kerry Poe
Compare Data Utility

Summary
The Compare Data Utility allows you to view and differentiate the parameters and their values of selected elements.
- eVolve tab ⮞ Utilities panel ⮞ Compare Data button


Usage
- From the drawing area, select the desired elements for comparison.
- From the eVolve ribbon, in the Utilities panel, click Compare Data. The Compare Data window is displayed.
- After the comparison is complete, click Close.

Window Overview
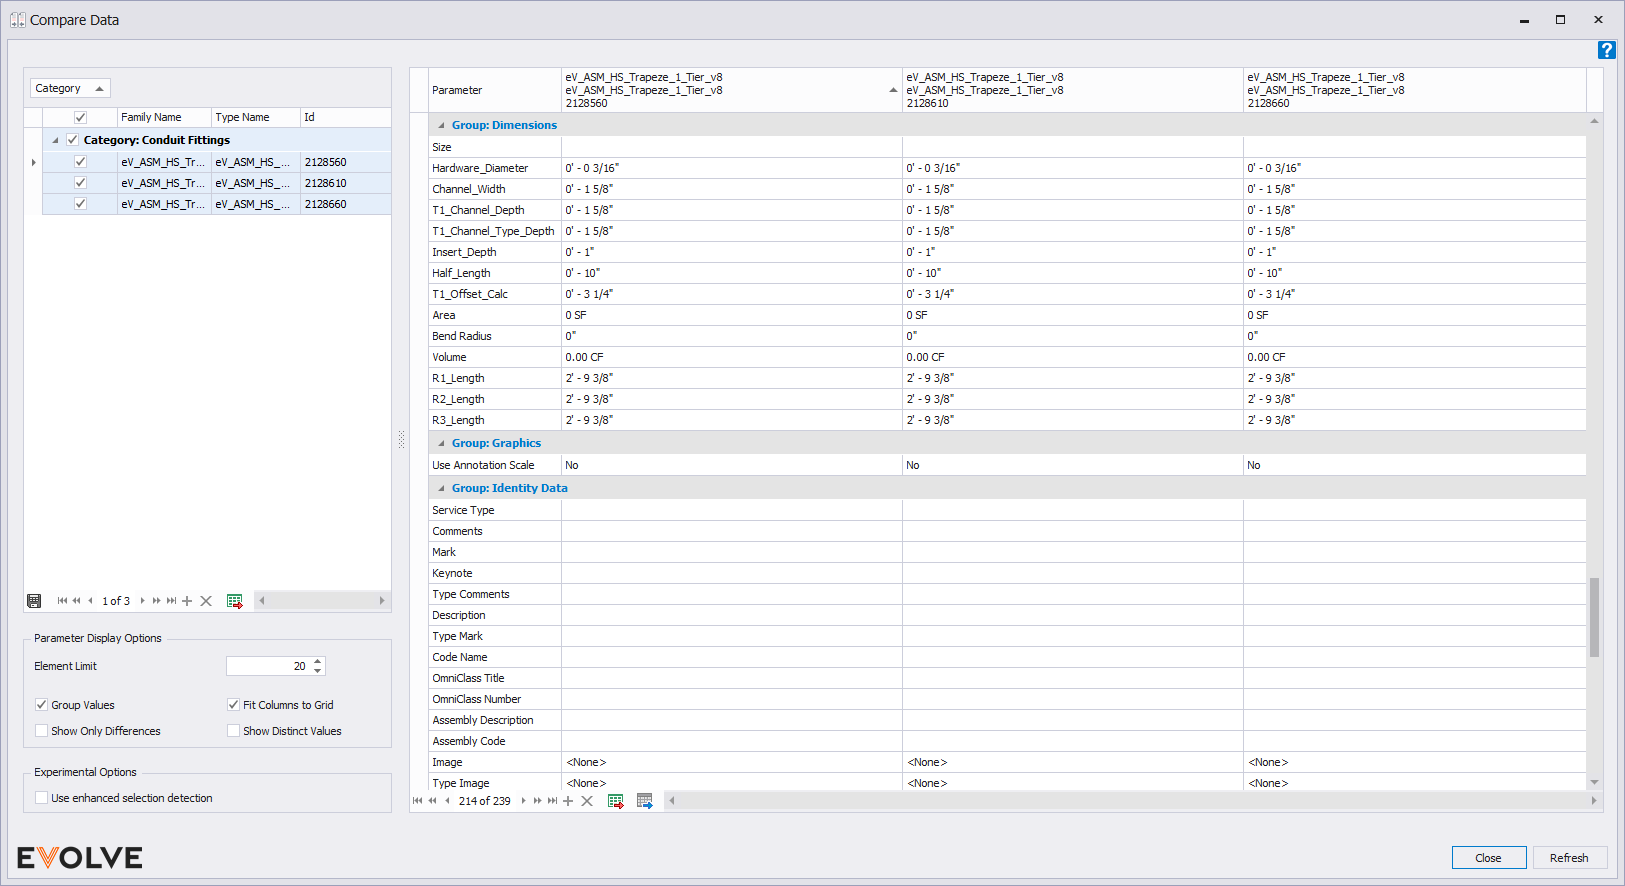
- Selected Elements grid - displays the selected elements.
- Data Comparison grid - the information displayed in the grid is populated based on the selected elements and the elected options selected in the Parameters Display Options panel.
- Parameter Display Options panel
- Element Limit selector - specifies the selection threshold, which prevents the window from automatically refreshing; enter 0 for no limit. This is a performance setting, as large selection sets can cause Revit to pause while values are calculated.
- Group Values checkbox - when enabled, parameters are grouped by the Revit Parameter Group they belong.
- Show Only Differences checkbox - when enabled, like parameter values are hidden.
- Fit Columns to Grid checkbox - when enabled, parameter columns are sized to fill the visible space in the grid. When disabled, column widths may be individually sized.
- Show Distinct Values checkbox - when enabled, a Distinct Values column is displayed. The column displays a list of unique values per parameter.
- Use enhanced selection detection - Uses a more responsive method for detecting changes in element selections.

Tips and Tricks
- TIP: elements may be selected/deselected while the Compare Data window is displayed.
