Data Table Tools
![]() Updated 2 years ago
by
Kerry Poe
Updated 2 years ago
by
Kerry Poe
Data Table Tools

Summary
The Data Tables Tools is a set of tools that allows two-way communication with an existing SQL database
IMPORTANT: this is an advanced tool designed for experienced users. EVOLVE does not offer support for SQL Server. It is the sole responsibility of the user to ensure their SQL Server is configured properly and their SQL statements are constructed correctly.
- eVolve tab ⮞ Integration panel ⮞ Data Table Tools button


Window Overview
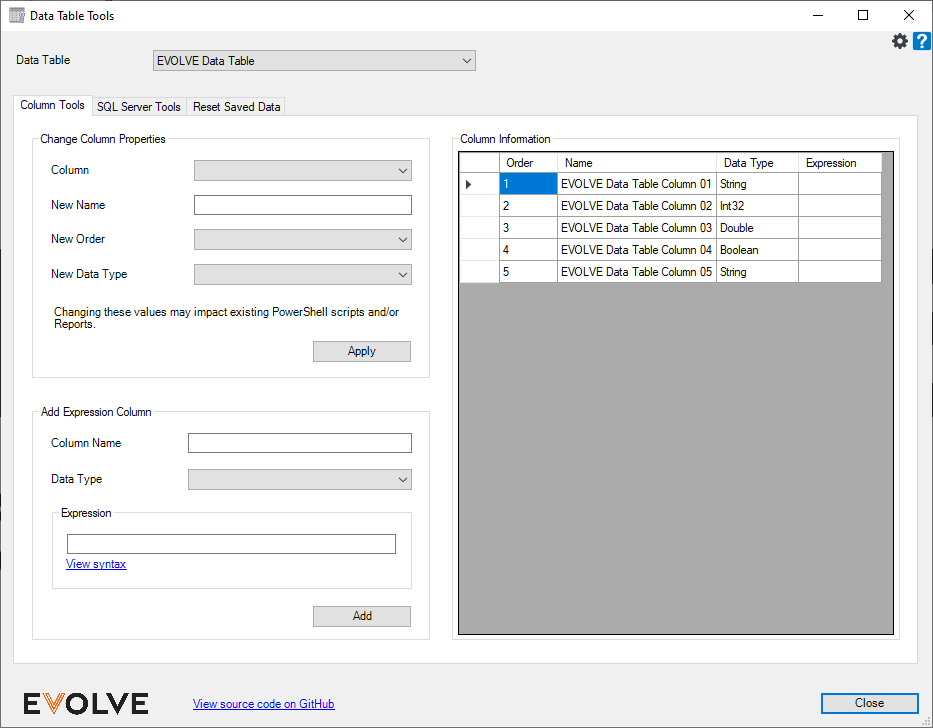
The Data Table Tools\Column Tools tab
TIP: Changes made on the Columns Tools tab modify the selected Data Table. You may revert changes to the Data Tables via the Revit Undo function.

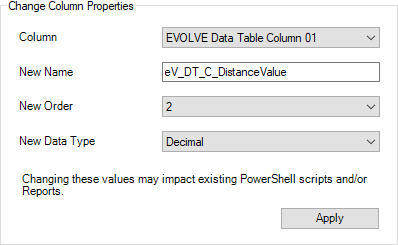
Change Column Properties panel
- Column menu - displays available column names. All modifications made in this panel are applied to the selected column.
- New Name text box - modifies the current value assigned to the selected column.
- New Order menu - sets or modifies the column's current order.
- New Data Type menu - proceed with caution; ensure the current values within the selected column are in a valid format for the new data type. The column's data type can change to one of the following types:
- String
- Int32
- Int64
- Double
- Decimal
- Boolean
- Date Time
- Apply button - commits the current modifications that appear in the Change Column Properties panel.
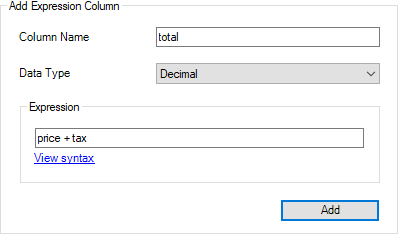
Add Expression Column panel
- Column Name text box - enter a unique value to identify the new column.
- Data Type menu - defines the new column's data type. A data type is the characteristic of a variable that determines what kind of data it can hold and what type of mathematical, relational, or logical operations can be applied.
- Expression panel - Enter an expression into the text box.
- Add button - once a valid Column Name, Data Type, and Expression are provided, clicking the Add button commits the current modifications that appear in the Add Expression Column panel.
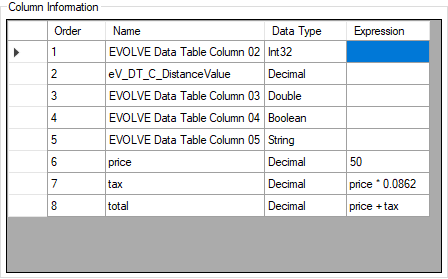
Column Information panel
Displays the following column information:
- Order
- Name
- Data Type
- Expression

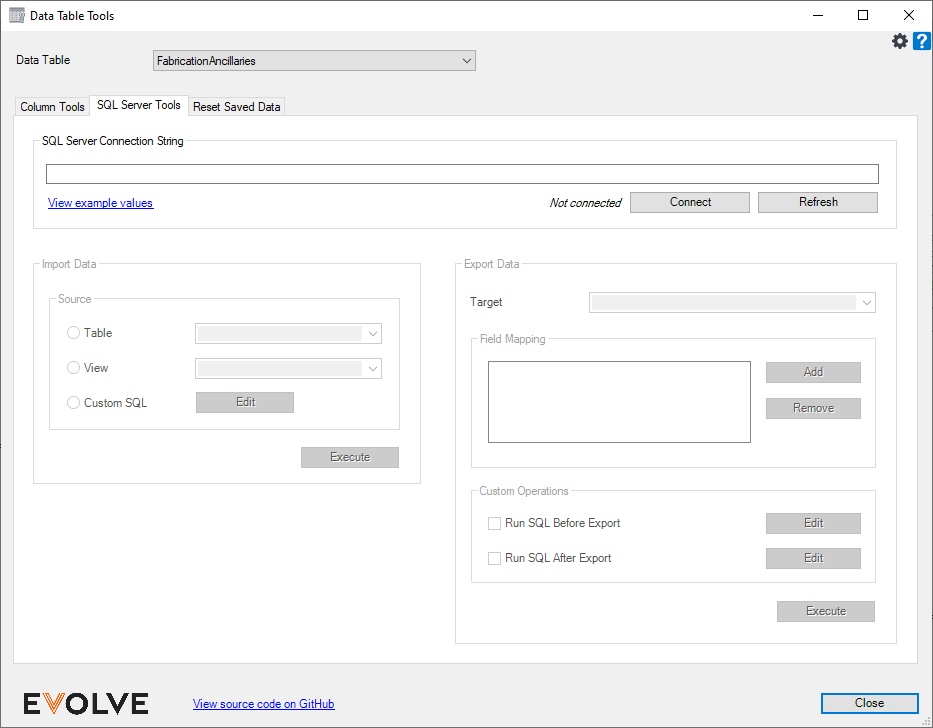
Data Table Tools\SQL Server Tools tab

IMPORTANT: Before attempting to connect to the desired SQL instance, ensure you or your IT Department has appropriately configured the security for the desired database.
SQL Server Connection String panel
- SQL Server Connection String text box - enter an expression containing the server instance, database name, authentication details, and other settings to communicate with the database server. Please see the following link for information on how to format the string - https://www.connectionstrings.com/microsoft-data-sqlclient/
- Connect/Disconnect button - after supplying a valid connection string, click Connect, the button's label changes to Disconnect, and the Not Connected label, displayed to the left of the button, changes to Connected.
- Refresh button - queries the specified SQL database, applying modifications that may have occurred since establishing a connection. For instance, you may have to click Refresh to see the newly created view in the Import Data\Source\View menu after creating a view in SQL.
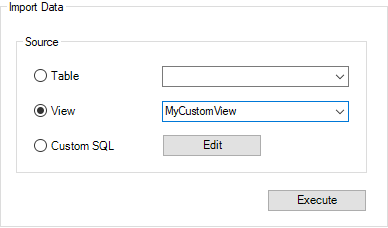
Import Data panel
Allows importing of data from the specified SQL database. You may import the data via a data table, view, or SQL Statement.

Source panel
- Table radio button - when selected, data imports from the table selected in the Table menu.
- Table menu - displays available tables in the specified SQL database.
- View radio button - when selected, data imports from the view selected in the View menu.
- View menu - displays available views in the specified SQL database.
- Custom SQL radio button - when selected, data is imported based on the criteria defined in the SQL Statement. Typically, this is a SELECT statement.
- Edit button - launches the Custom SQL window, used to enter SQL statements.
- Execute button - run the current elections in the Import Data panel.
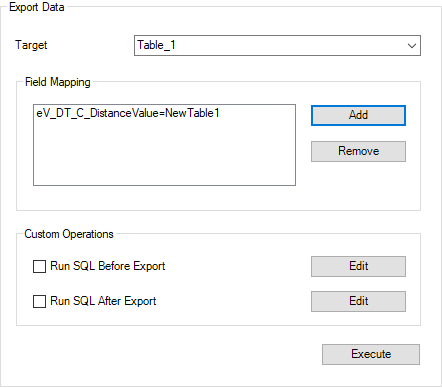
Export Data panel
IMPORTANT: Proceed with caution: changes to the SQL database are permanent and cannot be undone.
- Target menu - displays available tables in the specified SQL database.
Field Mapping panel
- Field Mapping list box - displays currently mapped fields.
- Add button - when clicked, the Add Column Mapping window is displayed.
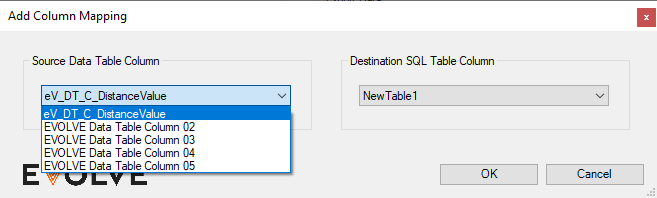
- Source Data Table Column menu - displays the available columns in the selected data table.
- Destination SQL Table Column menu - displays the available columns in the specified SQL database.
- Remove button - removes the selected mapping.
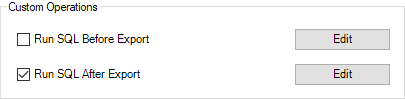
Custom Operations panel
- Run SQL Before Export checkbox - when checked, the statement in the Run SQL Before Export window runs after clicking the Execute button. A statement must be provided, or an error is displayed if the checkbox is selected when executing the function.
- Edit button for Run SQL Before Export - launches the Run SQL Before Export window; this window is for specific operations like clearing data in the Target SQL Table before exporting.
- Run SQL After Export checkbox - when checked, the statement in the Run SQL After Export window runs when clicking the Execute button. A statement must be provided, or an error is displayed if the checkbox is selected when executing the function.
- Edit button for Run SQL After Export - launches the Run SQL After Export window; this window is for specific operations like updating records in the Target SQL Table after exporting.
- Execute button - run the current elections in the Export Data panel.
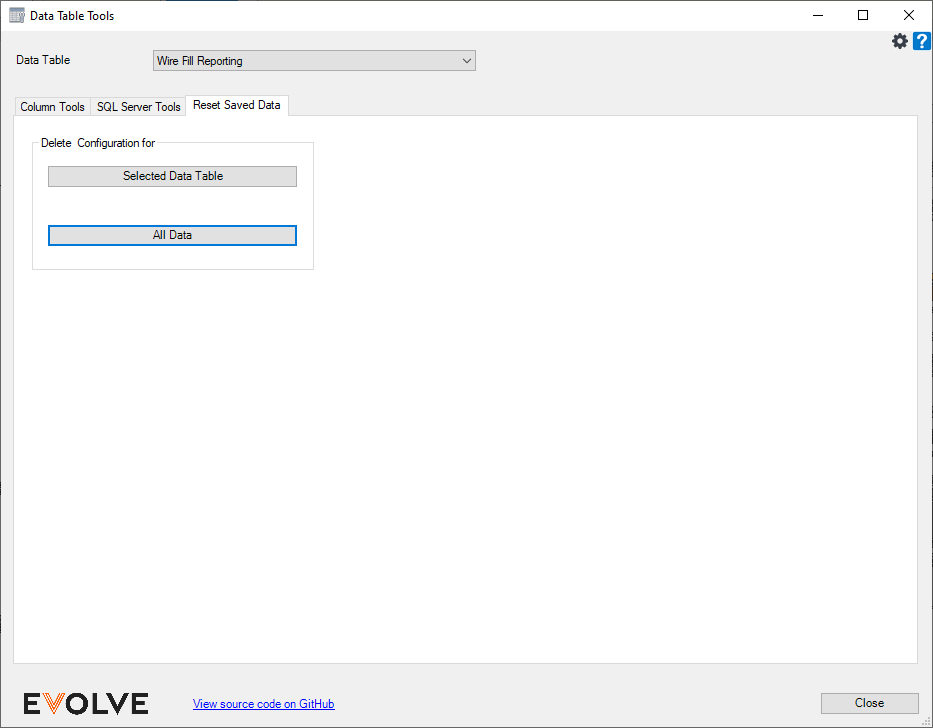
Data Table Tools\Reset Saved Data tab
- Delete Configuration for panel
- Selected Data Table button - when selected, the configuration for the selected data table is deleted. Proceed with caution; this action cannot be undone.
- All Data button - when selected, all Data Table Tools Configurations are deleted; this action cannot be undone.
CAUTION: this will delete ALL Data Tools Configurations.
