Align Couplings
![]() Updated 3 years ago
by
Adam Heon
Updated 3 years ago
by
Adam Heon
The Optimize Bends features allow for a streamlined workflow for prefab and design optimization, with much less time needed to be spent cleaning up groups of bends. With these new tools, a designer can draw in all of their conduits and smart bends into the project and come back and quickly adjust the smart bends with just a few clicks. Then, utilize the Align Coupling command wherever needed to bring all of the couplings into proper alignment. Now the run is fully optimized to utilize full stick lengths and has aligned couplings.
Using the Align Couplings feature
- From the eVolve ribbon, in the Conduit Bends panel, click the Align Couplings button
- Select a reference coupling/bend from the group that would be best for aligning the other couplings to. (Typically the bend with its coupling closest to the bend)
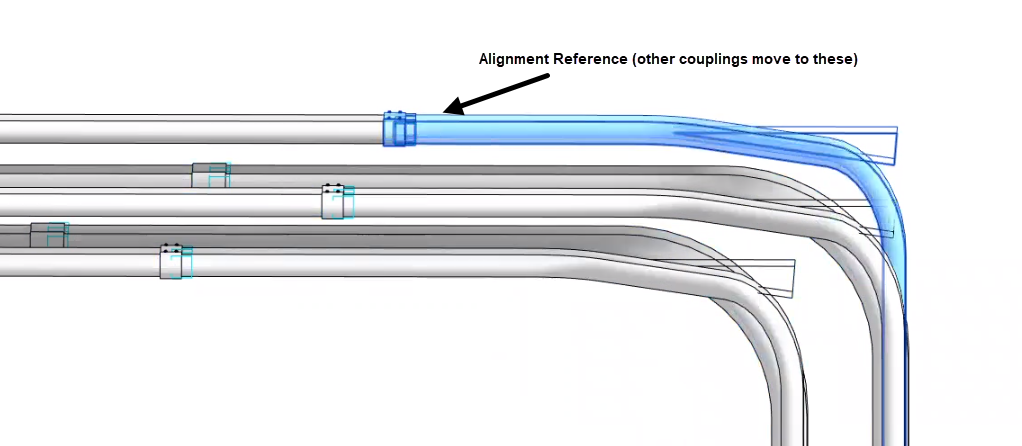
- Window select the bends/couplings that will move to the reference
- Click Finish