Nesting Points
Nesting a Point into a Family

Overview
Rather than adding points to each instance of an object, it can be much faster to have points already nested into the family, so that when the object is placed, the point(s) is ready for use.
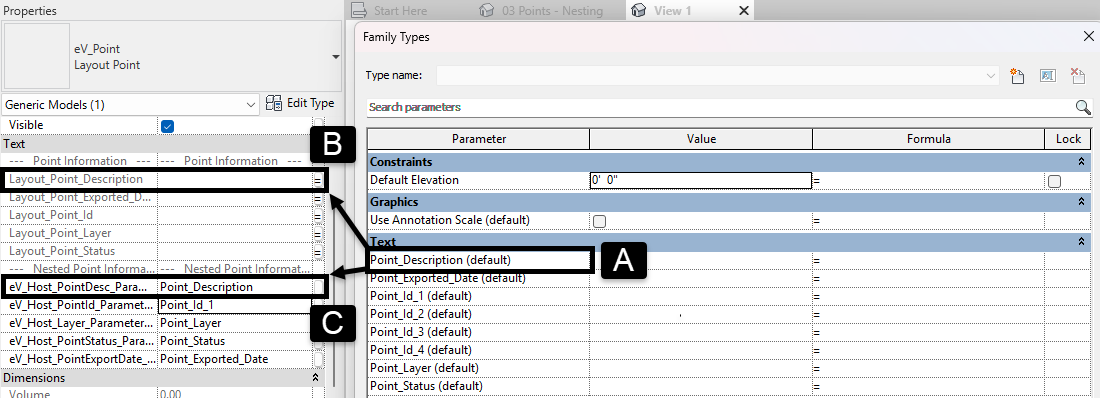
- Within the Host family (A) create a series of instance text parameters that align with the point family.
- Each point has five fields (Id, Description, Export, Layer, Status) if any of these fields are missing EVOLVE will prompt you with a warning. However, only Id is needed to work, but to take full advantage of EVOLVE points all should be added.
- The names of the "host family" parameters are not critical; within the host, they may be named something else like Point Id.
- If multiple points exist in a family, you'll want a unique point id parameter, but only one instance of the other parameters, e.g., Point_Id_1, Point_Id_2, etc.
- You do have an option to "fix" a value in the parameter, i.e., if you ALWAYS wanted that point to have a point description of "Light" you could lock that value into the description parameter and you don't need to link it, so the process here is just assuming ALL parameters will be open.
- Within the nested point family, first link the main point parameters (B) to their corresponding host parameter (A).
- Next within the nested point family, manually type in the name of the host parameter (A) into its corresponding "nested point field" (C)
NOTE: if a typo exists in this field, an error will be displayed when EVOLVE tries to use the point.

Steps
Nesting The Point In A Family
- From a project, locate or place the desired element to hosting the point.
- From the eVolve ribbon in the Points panel, click Create Points.
- From the Create Points window, define the following, and click OK.
- From the Family Type menu, select the desired point type.
- From the Point Information panel, enter the necessary data.
- From the Point Placement panel, ensure the Single Point radio button is selected.
- From the drawing area (near the intended hosting element), click to place the newly created point in the project. (See below)

- Select the host item and click Edit Family.
- Return to the original project and view, select the point, then click Edit Family from the ribbon.
- Click Load into Project and Close, when the window appears, select the new host family and click OK. Do not save changes to the point family.

- From the drawing area, place the Point at the desired location and lock it to the appropriate reference planes.

Creating New Parameters
- From the Modify ribbon, click Family Types.

- From the Family Types window, click Create New Parameter.
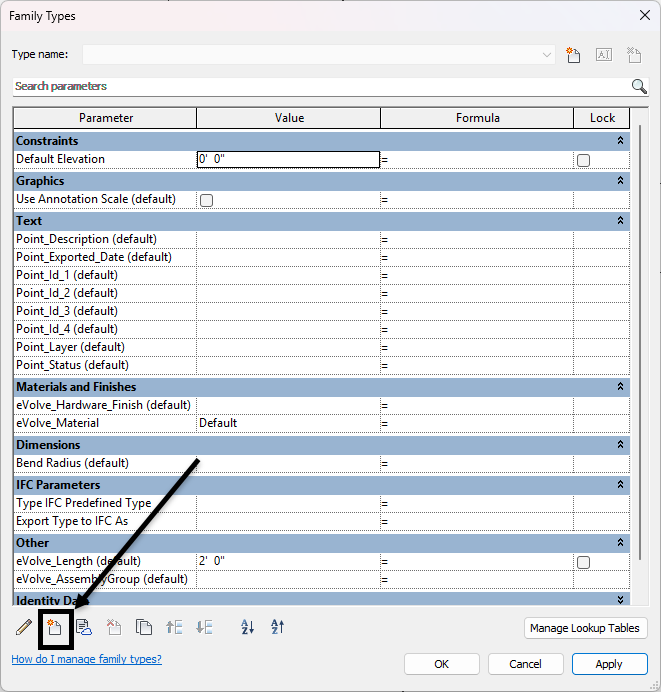
- In the Parameter Properties window, match the following options to create a Description parameter, then click OK.

- Repeat steps 2-3 to create Id, Export, Layer, and Status parameters.
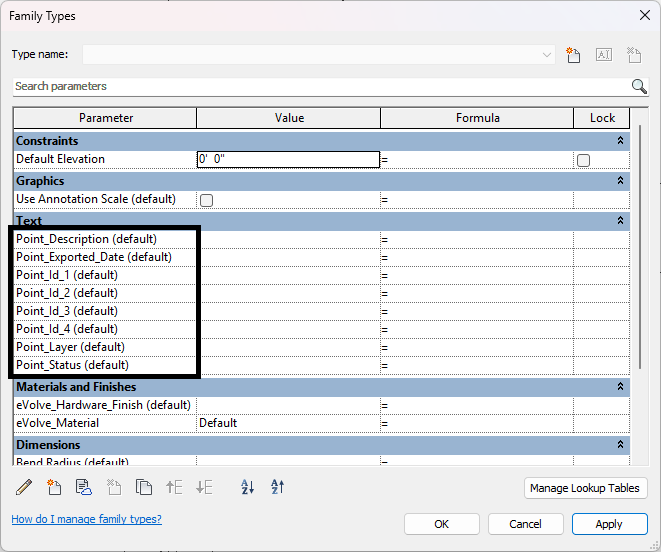
- After all the parameters have been added, from the Family Types window, click OK to apply the settings and close the window.

Associating Existing Parameters With The Newly Created Parameters
In the Properties Palette, "link" the existing point parameters to the new parameters in steps 2-4 in the Creating New Parameters section above.
- From the Family Editor (Modify ribbon), select a point that was just added.
- To associate the parameters, from the Properties Palette, in the Text section, click the small gray box to the right of the desired text field(s).
- From the Associate Family Parameter window, select the desired parameter and click OK. If the link works, the gray box will display an equal symbol ( = ).
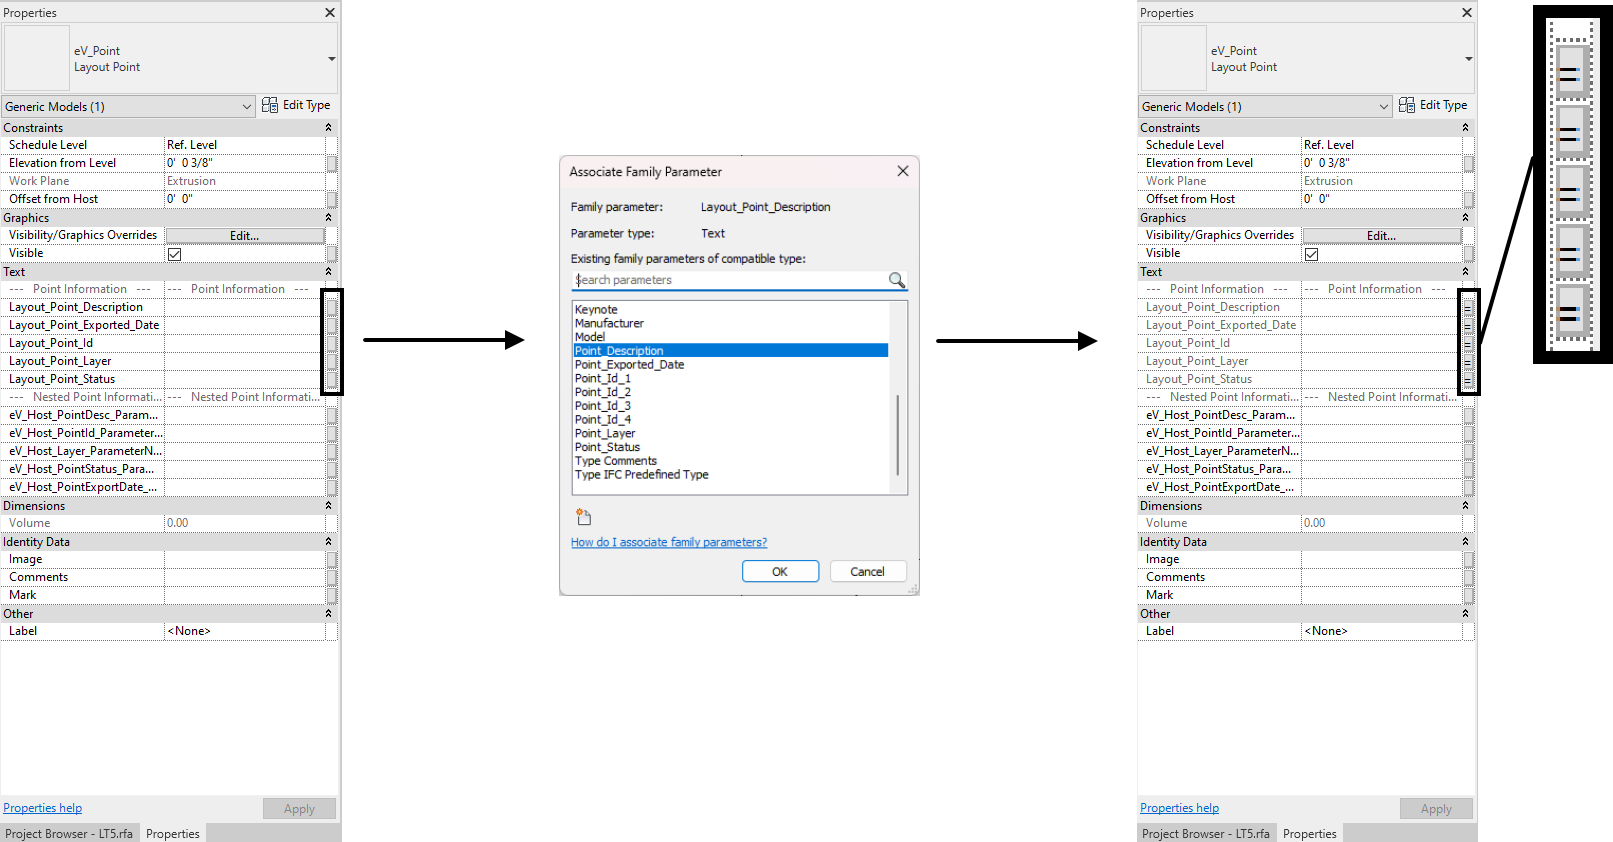
- Repeat steps 2-3 until all necessary parameters are associated.
- In the blank text field next to eV_Host_PointDesc_ParameterName, Type Point_Description (Or whatever name was used for the description parameter, must match exactly)
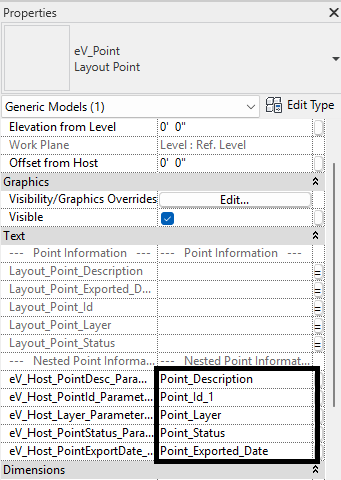
- Repeat step 5 for any additional parameters.
- Load the new host family into the project and utilize points as usual.

