User Interface
![]() Updated 3 years ago
by
Adam Heon
Updated 3 years ago
by
Adam Heon
The Ribbon

- The EVOLVE Electrical ribbon tab is found near the right-hand side of the standard Revit tabs.
- The EVOLVE Electrical ribbon is divided up into "panels", think of these as feature categories.
- Each panel contains feature buttons for that specific panel category.
The Buttons
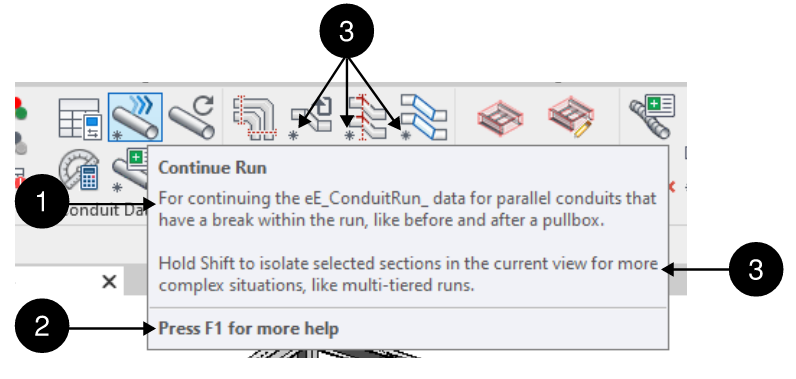
- Upon hovering the mouse over each button, a tooltip will be displayed to explain what the specific button does.
- Also displayed within the tooltip is an indicator that the button has an "F1 Help Link". Users can press the F1 key which will bring them to the specific help article for that feature.
NOTE: Within all feature UI windows, a blue question mark is present which provides a link to the relevant help article as well. - Some buttons may contain an asterisk (*) in the lower left-hand corner. This is an indicator that the feature contains a "Shift" function, meaning prior to clicking the button users can hold the "Shift" key and a different function will be enabled. The tooltip will also provide a description of what the Shift function does.
The Settings
For features that contain settings, users can access these settings in three areas on the EVOLVE ribbon.
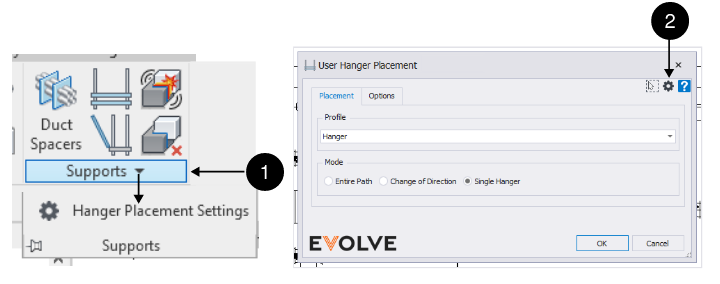
- Within the panel where the button is located, users can click on the panel name which will display the setting icons for the features that are found within the panel selected.
- Within the upper right of the feature UI, there will be a sprocket icon that will open the applicable settings UI for that feature.
- Within the Resources panel, all settings for all features can be found nested under the Settings button.
Hotkeys
Hotkeys (or keyboard shortcuts) should be used for any feature that is repetitively used, the use of hotkeys can improve performance when navigating through the EVOLVE & Revit interface. Hotkeys can be assigned to EVOLVE features similar to native Revit features.
Click HERE for more information.

Learning Tracks