Conduit
![]() Updated 3 years ago
by
Adam Heon
Updated 3 years ago
by
Adam Heon
eVolve Electrical has taken Revit’s basic conduit feature and enhanced it to load preconfigured conduit families. eVolve automatically adds drawn conduits and fittings into streamlined BOMs and schedules with no additional information needed to be added.
The Conduit window displays two preconfigured eVolve Conduit families, which can be further customized by the user. The Factory Elbows option will display multiple types and material options for drawing with standard factory angles. This family will load with the appropriate fittings assigned to each type and will appear in the appropriate BOM. These types can be assigned a tolerance in the Edit Type window to allow users to draw angles within tolerance and still appear in the BOM as factory bends. Angles drawn outside of the tolerance appear in the BOM as conduit length.
The Prefab Bends option will display multiple types and material options for drawing with prefabbed bends in mind. Rather than loading with fittings, this family loads with an eVolve Offset family in its place. Users can utilize the split element tool on a prefab bend conduit, and the offset will be automatically placed with full adjustability. Bends appear in the BOM as conduit length.
The System Families/Conduit tab
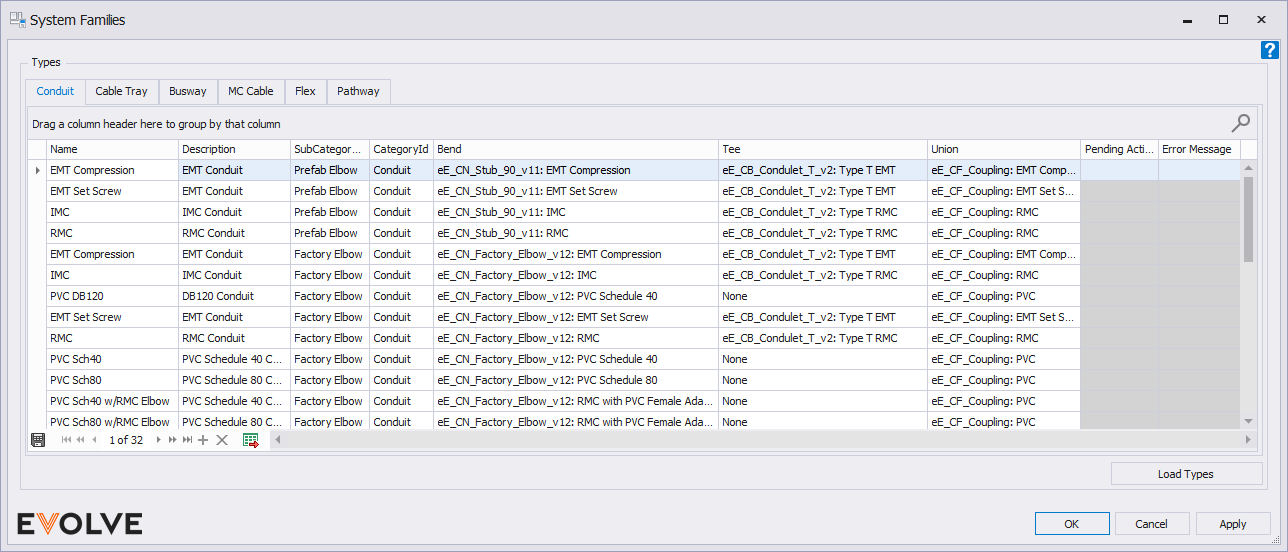
Name- the type name of the conduit.
CategoryId- the category to group the conduit in.
SubCategoryId- The subcategory to group the conduit in.
Description- The eE_Description parameter will appear in schedules and BOMs.
Bend- defines the bend family to use with the conduit.
Tee- defines the tee to use with the conduit.
Union- defines the coupling type to use with the conduit.
To draw with conduits
- From the eVolve Electrical ribbon, in the Utilities panel, click System Families.
- From the System Families window, on the Conduit tab, click Load Types.
- Once the types are loaded, double-click the desired row to start drawing.
- Select a type and click OK.
Loading an item from this menu or clicking Load Types will load all the conduit families into the project. This allows much faster drawing by eliminating family load times after the initial load. All the conduit can then be accessed in standard Revit locations, the eVolve Ribbon, or by typing the “CN” keyboard shortcut.
To Change a Type Description
Method 1:
- From a project view, select the conduit to be renamed.
- From the Properties Palate window, click Edit Type.
- From the Type Properties window, in the Value field next to the Description parameter, type the new description. Click OK.
Method 2:
- From the System Families window, click in the description field of the type being changed.
- Enter the new description and click Ok.