Start Cable
![]() Updated 2 years ago
by
Adam Heon
Updated 2 years ago
by
Adam Heon
Start Cable

Summary
There may be instances when auto-run may not route a cable to a specific need. The Start Cable feature allows users to manually route some or all of a cable run, while still maintaining most of the auto-routing features and benefits. This data is also automatically loaded into a run schedule.
- eVolve tab ⮞ Cabling panel ⮞ Start Cable button


Usage
To Start a Cable
- From the eVolve ribbon, in the Cabling panel, click Start Cable.
- From the Start Cable window, enter the necessary Elevation, Leader Length, and Cable Type for the first bend.
- Click Ok.
- From the drawing area, click on the starting device.
- Click Cancel to end this feature or repeat Step 4 to place more cable.
- Draw to or from the cable as with standard drawn cable.

Window Overview
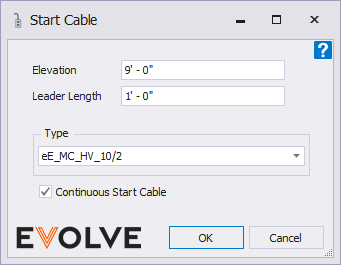
- Elevation - defines the elevation that the cable is routed from the device.
- Leader Length - defines the additional cable length added from the defined elevation point.
- Type - displays the available types loaded in the model.
- Continuous Start Cable - when checked the command remains active until the ESC key is pressed.

Tips and Tricks
- The Continous Start Cable feature allows the Start Cable feature to be used on multiple elements without having to go back to the dialog window each time.
