Sleeve Settings
![]() Updated 10 months ago
by
Adam Heon
Updated 10 months ago
by
Adam Heon
Sleeve Settings

Summary
As with hangers, the Sleeve Placement feature in eVolve is controlled by rules dictated through Sleeve Settings. Here you can create custom rule sets for placement and choose from many options, such as links to evaluate against.
- eVolve tab ⮞ Resources panel ⮞ Settings Menu⮞ Sleeve Settings button


Sleeve Settings/ Sleeves tab
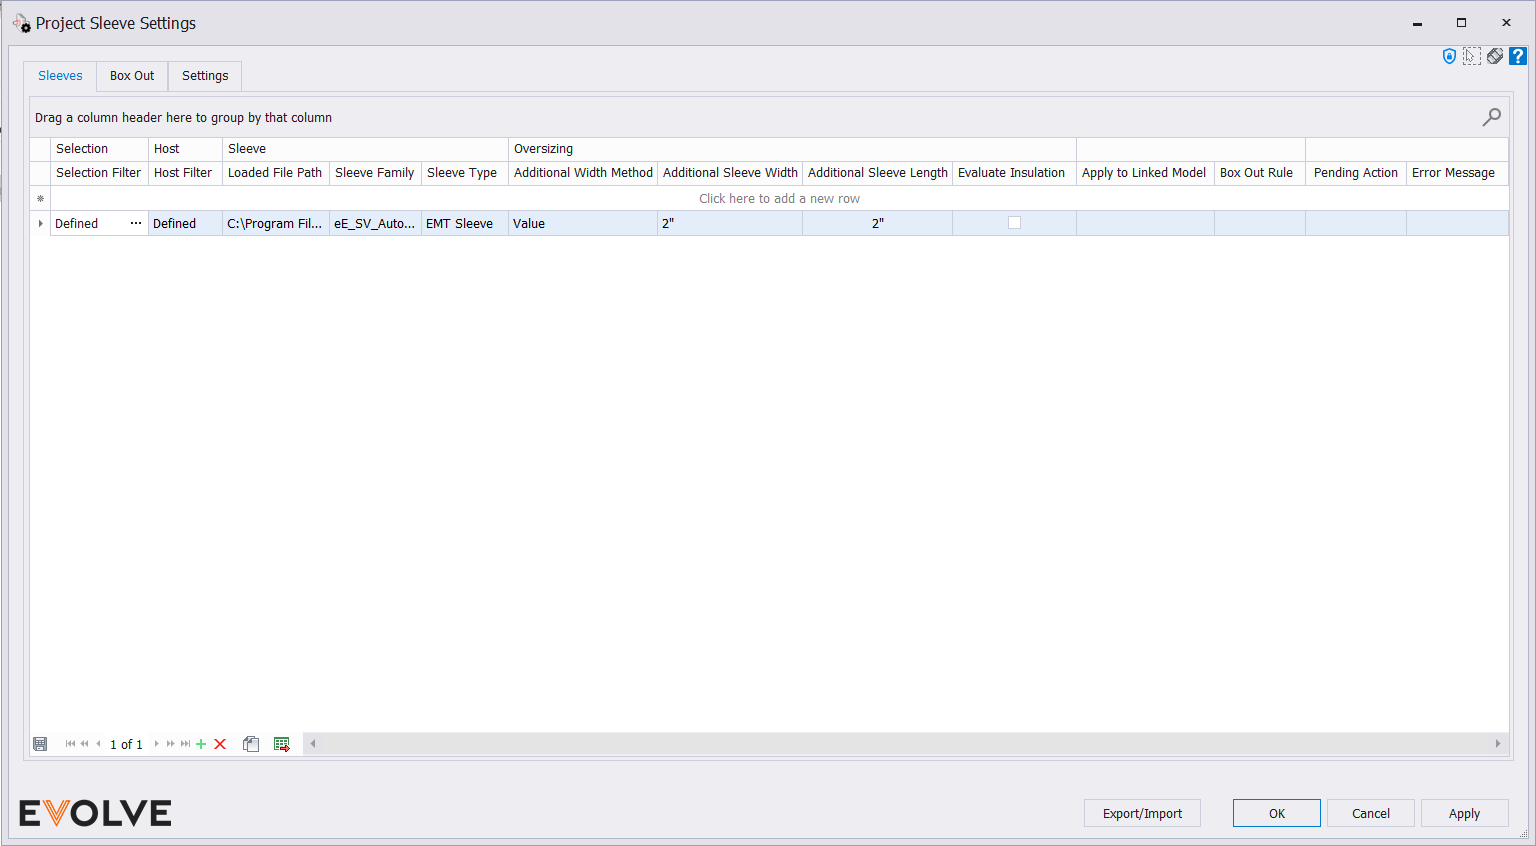
Bands and Column Headers
Selection band
- Selection Filter text box - an element filter used to define the run type that the current rule set applies.
Host band
- Host Filter text box - an element filter used to define the element(s) hosting the sleeve for the current rule set.
- NOTE: For the category "Structural Foundations" only family types for the Wall Foundation system family are supported.
Sleeve band
- Sleeve Family menu - displays available sleeve families loaded in the model.
- Sleeve Type menu - displays available types for the selected family.
- Loaded File Path text box - defines the file path of the sleeve family.
Oversizing band
- Additional Width Method menu - defines the method used to calculate the additional sleeve width.
- Value - a standard value such as 2"
- Index Position - for fabrication parts, you can also oversize the sleeve by the next available sizes available to the host element. An example here is +2 for applicable Pipework.
- Additional Sleeve Width text box - the sleeve width is oversized by the specified value (options are dependent on the Additional Width Method)
- Additional Sleeve Length text box - defines the amount the sleeve's length will increase beyond the default value.
- Evaluate Insulation checkbox - when enabled, the sleeve is oversized by the insulation thickness.
- Apply to Linked Model menu - allows users to apply specific sleeves to linked projects by selecting from a list of models that are linked in the current project.
- NOTE: if no linked model is selected, then it defaults to Project Sleeve Settings "Loaded Linked Models".
- Box Out Rule menu - displays available Box Out rule sets used to associate with the current sleeve rule set.

Record Navigator buttons
- Add - used to add a new row to the grid.
- Delete - used to delete selected row(s).
- Duplicate - used to duplicate selected rows.
- Export Grid - exports the grid as currently displayed to Excel.

Sleeve Settings/ Box Out tab
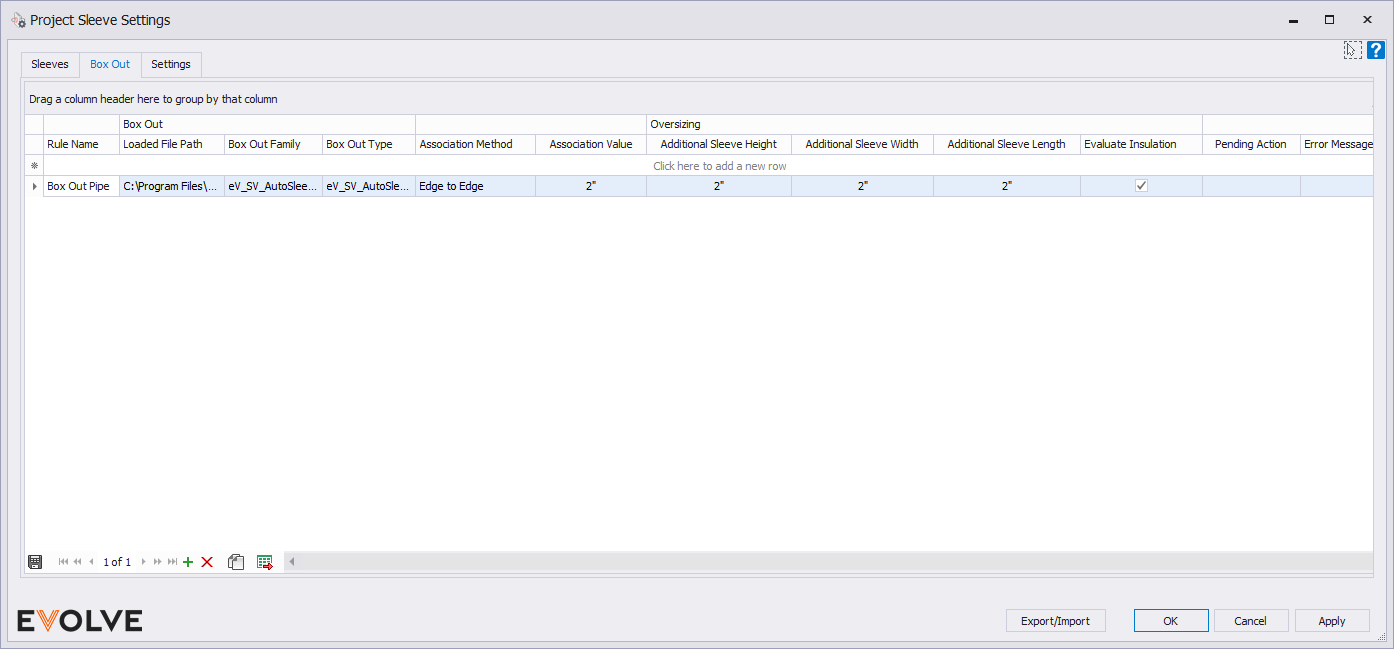
Bands and Column Headers
- Rule Name text box - rule identifier used on the Sleeves tab to associate the Box Out rule set to the Sleeve rule set.
- Box Out band
- Box Out Family menu - displays a list of the available Box Out families loaded in the model.
- Box Out Type menu - displays available types for the selected family.
- Association Method menu - defines the method used in determining the proximity of the elements to one another.
- Center to Center
- Edge to Edge
- Association Value text box - used to define the distance elements must be within for conversion.
- Oversizing band
- Additional Sleeve Height text box - defines the amount the sleeve's height will increase beyond the default value.
- Additional Sleeve Width text box - defines the amount the sleeve's width will increase beyond the default value.
- Additional Sleeve Length text box - defines the amount the sleeve's length will increase beyond the default value.
- Evaluate Insulation checkbox - when enabled, the sleeve is oversized by the insulation thickness.

Record Navigator buttons
- Add - used to add a new row to the grid.
- Delete - used to delete selected row(s).
- Duplicate - used to duplicate selected rows.
- Export Grid - exports the grid as currently displayed to Excel.

Sleeve Settings/ Settings tab
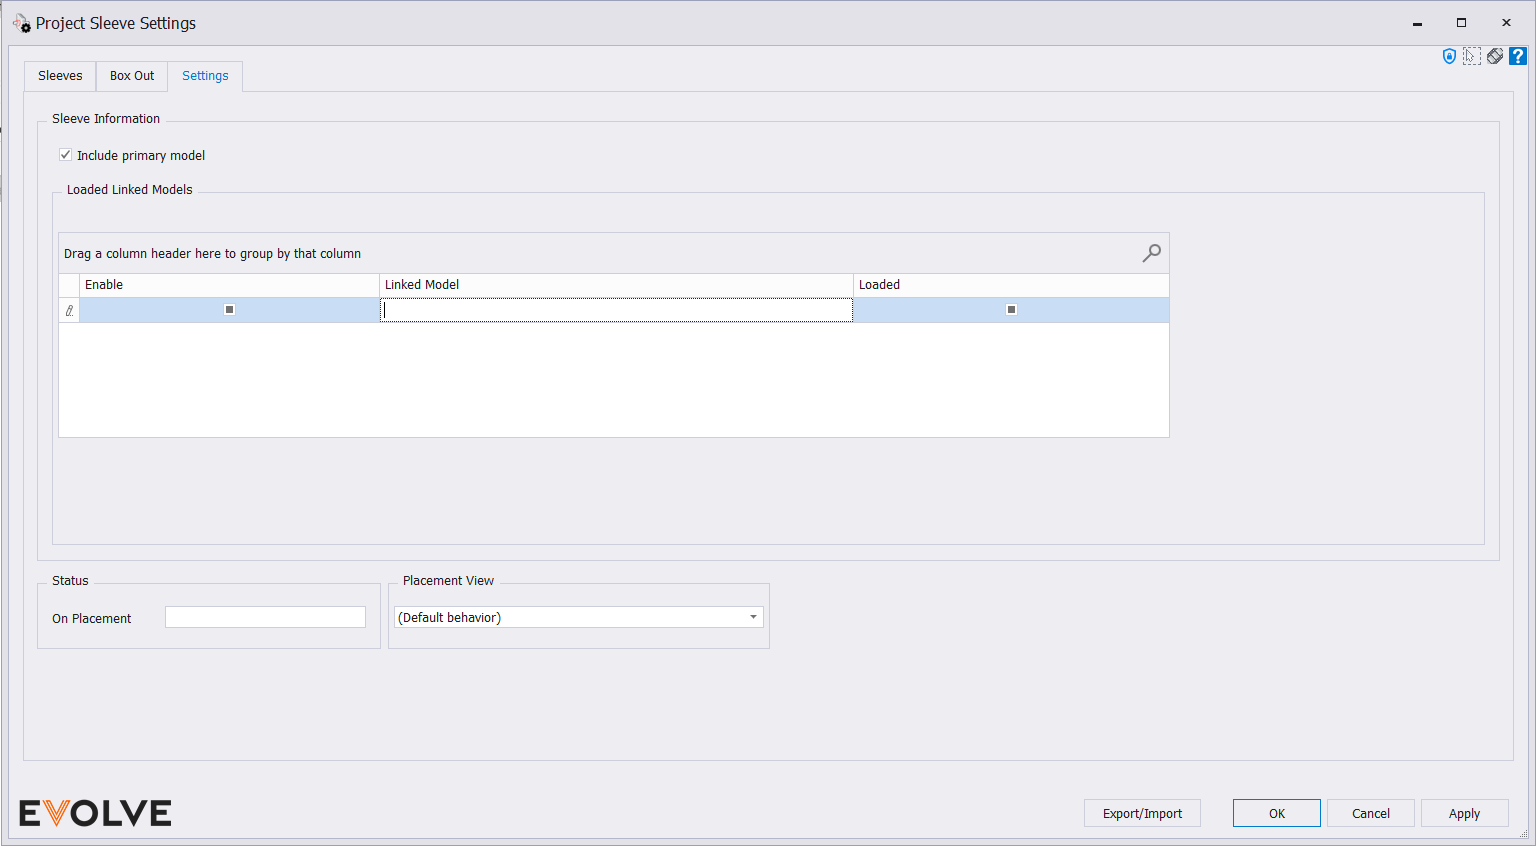
Sleeve Information panel
- Include primary model checkbox - when enabled, elements in the primary model are also evaluated.
- Loaded Linked Models panel - displays a list of all "loaded" and "unloaded" linked models.
- Enable Checkbox - check the links you would like to make active for sleeve/boxout placement.
- Linked Model text box- name of linked model.
- loaded Checkbox - displays the status of project links so users can see if a link is loaded or unloaded.
- Note: if the link is unloaded, users can still define the link in the settings, but running the command would not function properly until the link is reloaded.
- Status panel
- On Placement menu - the specified value is applied to the Sleeve_Status parameter.
- Placement View panel
- The Placement View menu is used to select a specific used to calculate proper placement.
For example, if multiple links contain similar floors, this placement view should only show the valid floor and the other floor(s) should be hidden. This will ensure that EVOLVE places sleeves against what is valid.
